We noticed the ceiling in the living room was sagging a bit and wanting it to look as smooth and flat as possible before we start painting we did a bit of investigating to see how the ceiling is held up. Turns it its by lots of these guys ... banding which is made from plaster and raw fibre (probably hemp). The bandings are stuck over the wooden beams and onto the ceiling and half had come loose like this one.
So we made up some props to hold up the ceiling, made from lengths of pine, small off cuts of wood were drilled onto one end, and then old carpet cut out and glued onto the wood to protect it from leaving marks on the ceiling. The props were put into place to push the ceiling up and stayed like that until we were ready.
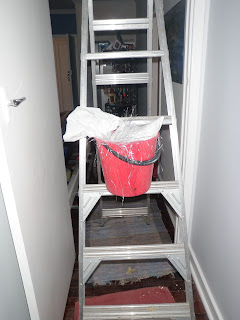
There's not a lot of room up there in the roof its pretty claustrophobic. Plus its really dusty. And smokin hot with temps in the high 30s for weeks it was like a furnace in there. And did I mention spiders. Euuuuwwww no thanks I'm really good at holding the ladder and having an icy cold drink waiting instead. So Pete the master DIY-er climbed up there solo. The insulation had to be lifted up and dust and dirt cleaned off the beams so that the plaster would adhere to it. A broom worked well for this and spraying the beam with water also made the plaster adhere better. Once it was prepped we made up the mix for new bandings - 2 ltrs casting plaster, 1 ltr hydrated lime then add water until its like a runny pancake mix. The lime gives elasticity to the plaster which makes it easier to spread and gives you a bit more time before it sets. In this heat it went rock hard after 15 minutes so you've got to work pretty quick! We used the drill with the mixer attachment, which was a godsend honestly I don't know how I stirred paint with a stick for so long. The rovings were taken up separately in a bucket to be mixed in as you went as they were too hard to separate into each banding once in with the plaster.
Once the mix was ready you had to quickly climb back up into the roof, find the area to do along the beam and put a handful of rovings into the plaster and mix it together then lay it over the beam packing it in tight and leaving plenty on either side to stick on. This is a look into the roof where you can see the bandings in place.
Each bucket did 5 bandings and we did a total of 10 buckets over 2 days. We waited a few days before moving the props over to prop up the ceiling on the other side of the room to be sure that they had set and secured onto the ceiling. It's looking pretty good.
I'm sure the roof guys would've charged about $500 per room for this job. Admittedly its hot, sweaty, dirty work so not for the faint hearted but if you want to save yourself some $$$ that's why we DIY.
DIY: $94
Plaster (20kg) $30
Lime (10kg) $4
Fibreglass Rovings (1kg) $15
Pine lengths (3mtr) $7.50 x 6
Water spray bottle (or paint brush) for water
Broom
Torch
Rubber gloves, Face mask & Knee pads
Pin It Now!


Wow what an exciting project! So nice you are sharing it. We just rent so it is so nice for me to imagine and follow along with you :-) Just joined your blog and look forward to seeing more. All the best for the new year!!
ReplyDeleteOMG, that looks like such hard work. I'm far too lazy to even contemplate my own renovation. I ironically prefer to work my arse off to save for someone else to do it and have none of the satisfaction of the 'project' for myself... hmmmm... x
ReplyDelete