Before we moved into our house we ripped out the ghastly green carpet in 4 bedrooms to reveal the original untouched raw jarrah floorboards. The rest of the house - the living room, hallway and kitchen have floorboards too. The bathroom and laundry are tiled.
For 3 days and nights we worked at restoring the floorboards before we moved in. But we were not satisfied with the finish and because they got a bit scratched when we moved our furniture in, as we paint each room we are again sanding and sealing the floorboards to really make them smooth and shiny.

For 3 days and nights we worked at restoring the floorboards before we moved in. But we were not satisfied with the finish and because they got a bit scratched when we moved our furniture in, as we paint each room we are again sanding and sealing the floorboards to really make them smooth and shiny.

This is a step by step on how we restored our jarrah floorboards ....
Prepping:
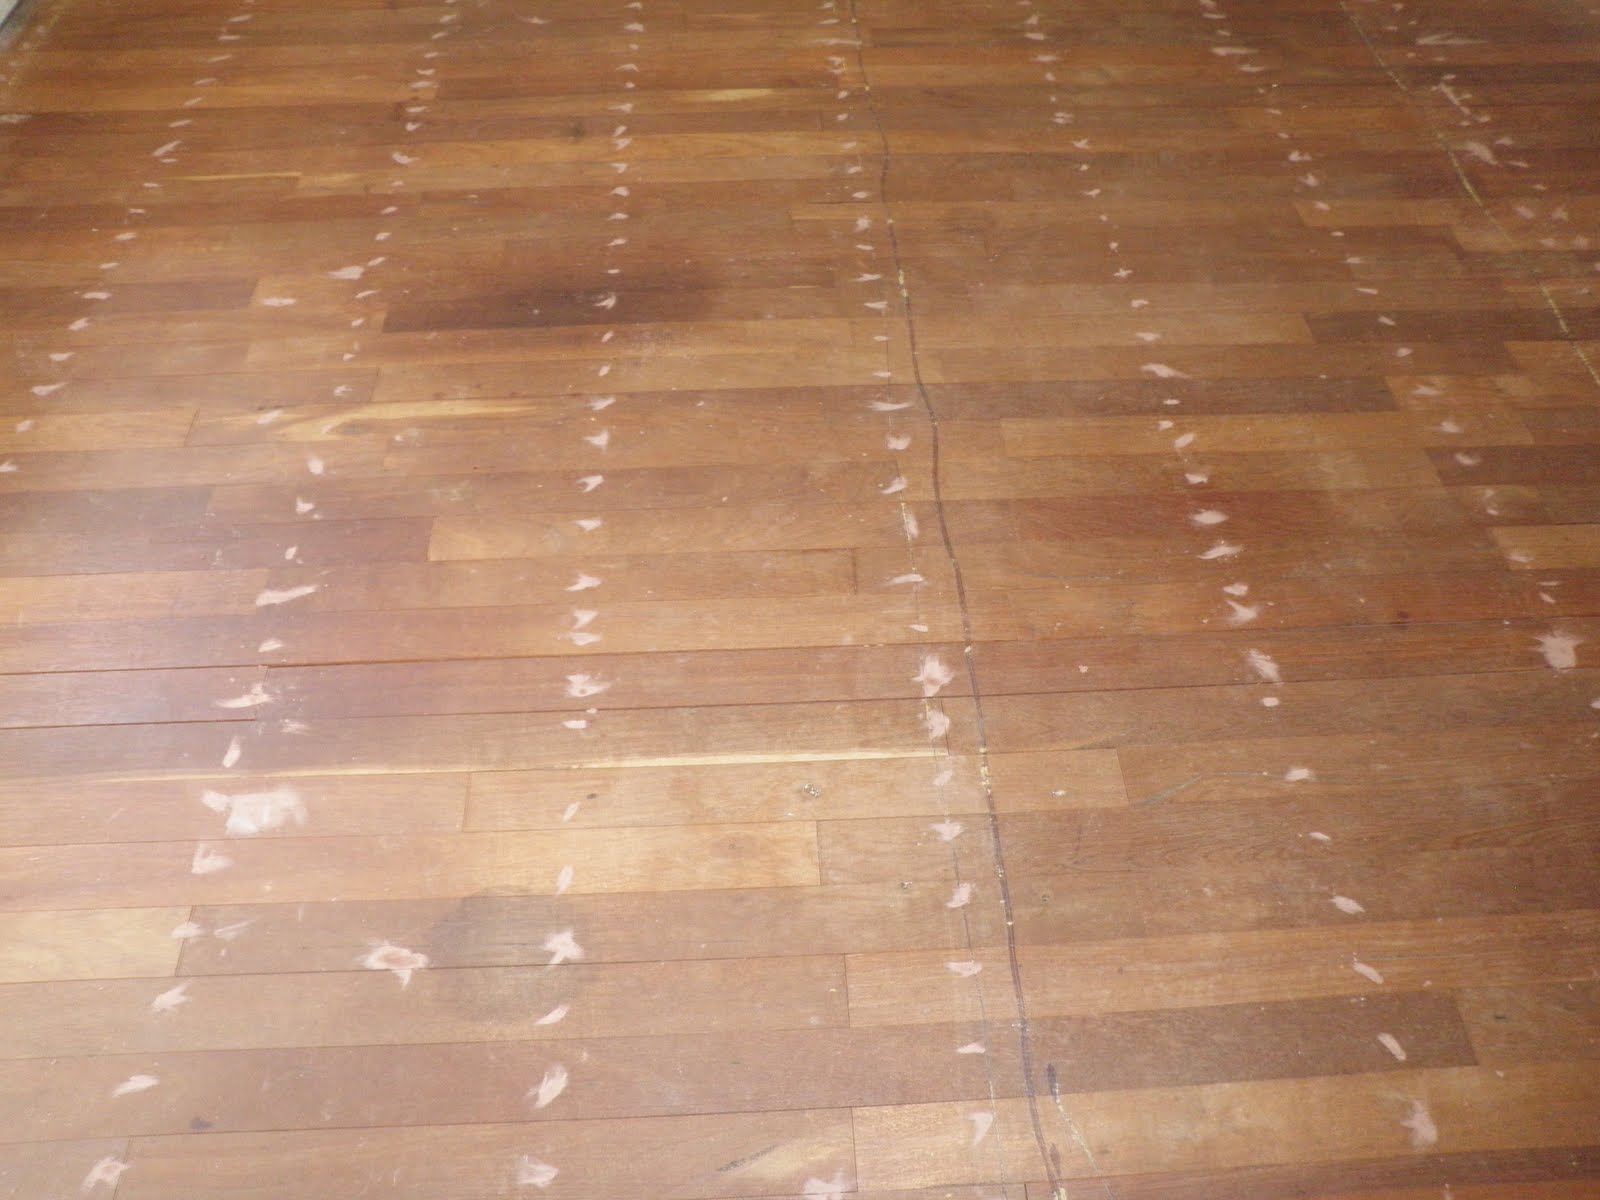
We used a floor punch to push down the nails to make the floor smooth for sanding, otherwise the nails rip the sanding paper and cause a few fireworks.
Then filled the holes with timber filler, we used a mix of jarrah and walnut filler to get the colour match as close to the colour of the floorboards as we could.
As you can see there were a lot of holes to fill!
Sanding:
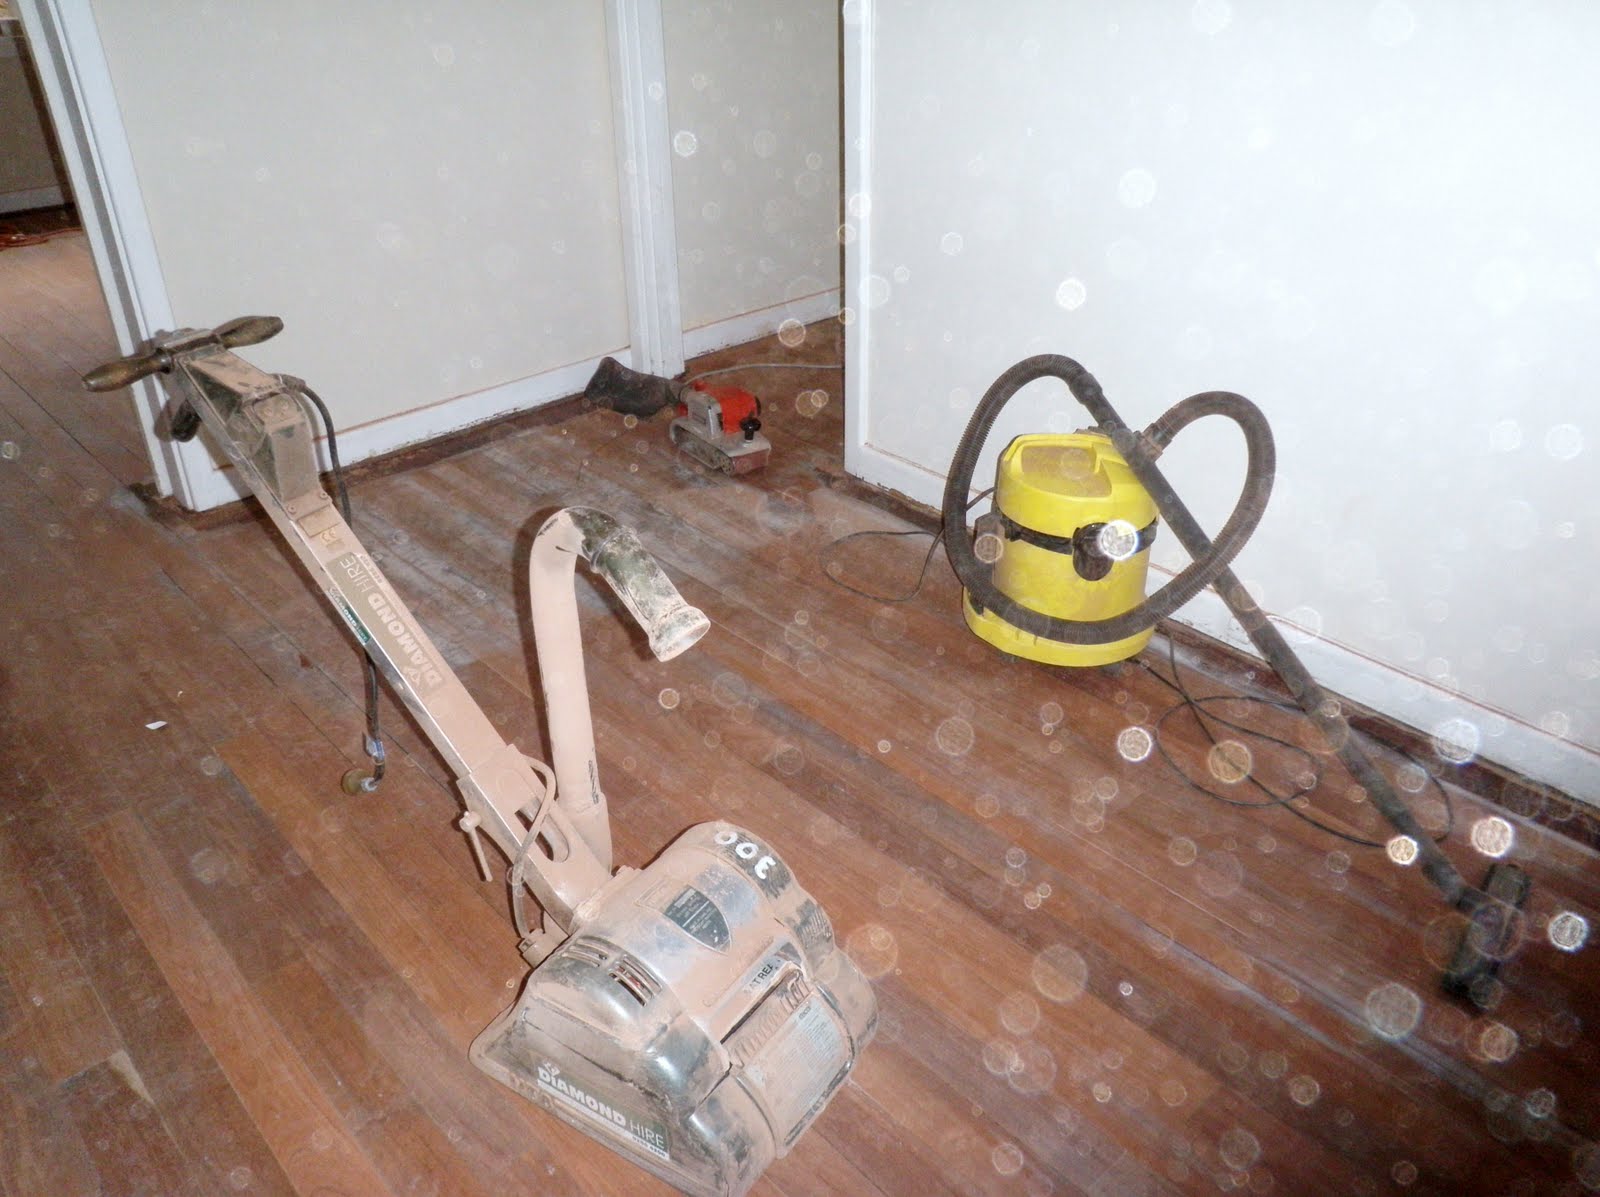
As for the tools of the trade we used - we hired a floor sander for 3 days and we bought an edging sander. We went through about 3 sanding belts each room.
Then to vaccum up all that dust, for that we bought a wet/dry vaccum, for $75 it's a great thing to have so you don't wreck your normal vaccum and we use it to clean up all our renovating work it has been a great investment.
So much dust - you can see the dust particles floating around in some of the pictures.
Hired a big sander and bought a vacuum - we're ready to work
Sanding with the big floor sander in the living room

Me sanding the edges of the guest bedroom (I promise I'm not giving "the finger"!)

Filling the gaps:
By room 3 we realised we need to put filler between the gaps of each and every floorboard to really seal it to make it easier to clean, so no dust gets in, or damp air or drafts and it also gives the boards a better look.
It takes about 10 hours each room to fill the gaps - not a good job if your impatient or get bored easily!
It takes about 10 hours each room to fill the gaps - not a good job if your impatient or get bored easily!
The filler is simply pushed in the gaps with your finger and then wiped off with a damp cloth

This is all the equipment you need -
Filler in the colour to match your floorboards (we combined 2 colours together)
containers to hold the filler as you go, a bowl of water and a cloth
containers to hold the filler as you go, a bowl of water and a cloth
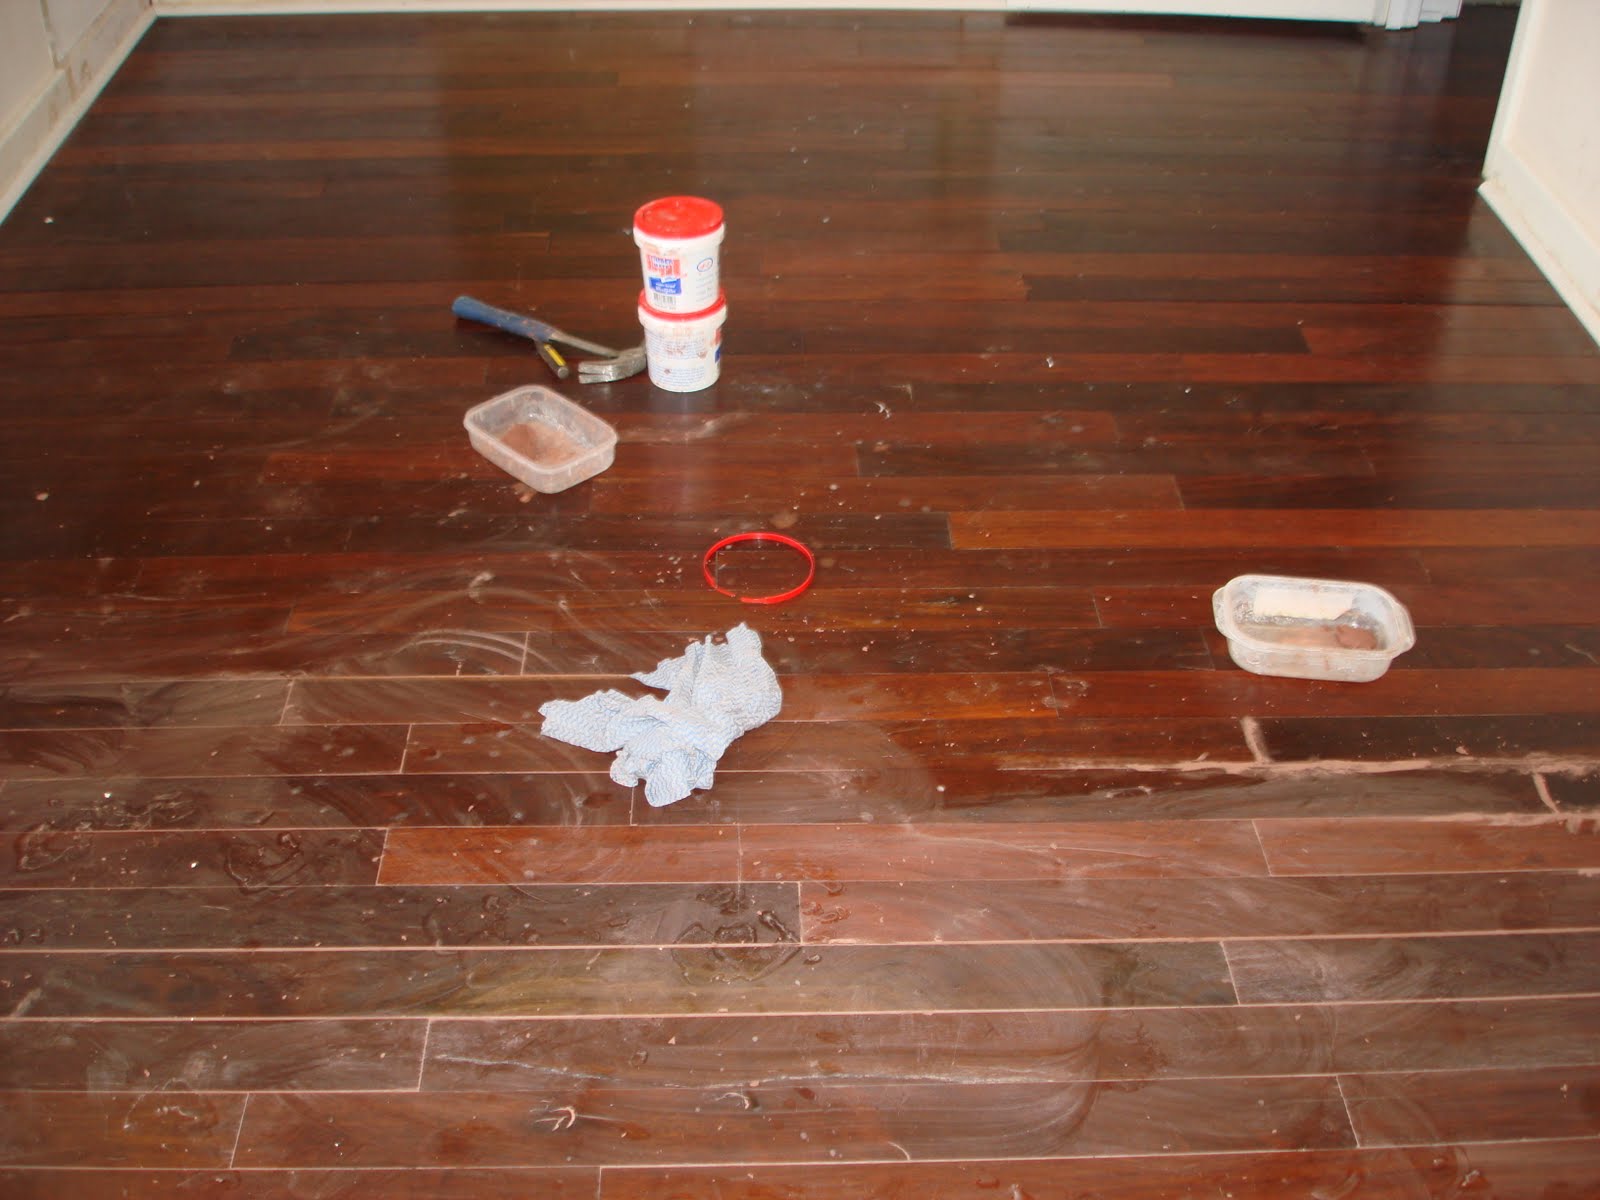
The gap is filled ..... literally a finger at a time!

Cleaning:
Before you can seal the floorboards you need to clean them and pick up every little spec of dirt, hair or fibre because otherwise it will be sealed into the floorboards forever!
Here's a tip: Wipe the floorboards over with methylated spirits and a cloth, this works really well to make them perfectly clean and ready to be sealed.
Sealing:
Whereas the varnish types although more hard wearing, if you scratch them you need to redo the whole room.
You really need to go away for a night or two once the oil is down as the smell is really strong (especially if you have allergies like I do).
Leave the floors for a few days before you walk on them and an entire week before you drag any furniture in to make sure they have completely set hard.
Putting on the sealer in the guest room with a brush, by hand,
took ages and left a few brush hairs behind too
took ages and left a few brush hairs behind too

The rest of the rooms we used a mop with a wool applicator which gives a good coverage and is a lot quicker although it also can leave fibres behind so take care to remove them before the oil sets completely


Then you can come home and look at those floorboards restored and shining in all their glory!
Floorboards AFTER


To finish off we hammered in new quarter-round to seal the edges and stop the cool air and any creepy crawlys from coming inside.

So that's how we restored the floorboards that give this blog its namesake Jarrah Jungle. Yes it has taken a lot of time and effort but to say we did it ourselves is worth it!
A professional would charge approx $3000+ to do the house and we have done ours for just over $1000.
Sander Hire (3 days) $270
Makita Belt Sander $120
Karcher Wet/Dry Vacuum $75
Feast Watson Floor Sealer $430
Sanding Sheets $80
Quarter round moulding $85
Filler @ $15 x 4 tubs $60
Total $1120
Check out more before and afters of the floorboard restoration HERE
To see how we repaired a hole in the floorboards go HERE


[All images my own]
Good work! I'm working towards putting in stairs with Jarrah and then a jarrah floor upstairs with tung oil did one tread the other day and was really happy with the result and now what you've has convinced me it will look really good, like you say a fair bit of work but the results you've got are a credit to your perseverance.
ReplyDeleteMay I know for the sanding sheet, what grit did you start and end with?
ReplyDeleteWe started with 120g and ended with 240g. Hope that helps!
DeleteThanks. but isn't it should start with 60 grit instead to get rid of uneven surface and ending around 120g rather than 240g? I don't think you can tell the difference between 120g and 240g on timber floor? These are based on my readings and I might be wrong.
DeleteThose grits worked well on our floors - 60 grit would have taken a lot long so we started with 120g :)
DeleteI live in Sawyers Valley and am restoring an old house from the 1900s. Of course it's majority Jarrah, with beautiful 130mm floorboards that I'm needing to do some work on, both on the subfloor and portions of the floor itself. What was the filler that you used?
ReplyDeleteHi Keith love the wide floorboards they will look great restored!
DeleteWe used Timber Mate from Bunnings which cost around $15 a tub :)
Hi Michelle, did you ever have any issues with the boards expanding and the filler coming up?
ReplyDeleteHi, no we have had no problems at all the floorboards are as good as the day we restored them, some 4 years ago now!
DeleteHi. Would you recomend filling between the boards before sanding or after? Or did you go back and resand the rooms you'd already done before realising you needed to fill?
ReplyDeleteHi Mary-Ann, do all your prep work first before sanding including filling the boards as the sander will remove any excess filler and make it all flat and smooth. We went back and resanded and then filled the first few rooms we did as we realised it was better to fill the gaps - it looks cleaner and smoother and you don't get sand, dust or dirt stuck in the cracks as there aren't any it's just one nice smooth surface :)
DeleteHi Michelle, I've a 60s house in the hills and considering pulling up carpets to restore the Jarrah floorboards. Is it possible to work on filling holes and gaps over time while living in the space? Aside from it looking ugly does it become solid and stay in place or does it need to be sealed in pretty quickly after filling? We just want to take our time doing this and are thinking about how long we can live with unfinished floorboards before doing the whole house like you did. Thank you!
ReplyDeleteHi Kate, I would suggest you do the floorboards room by room as you can't leave the filler in for long periods you need to seal it in. The main reasons are that it comes off with water so you can't mop the floors and it will get sand and dirt stuck to it as it's soft like a putty. We did one room at a time - gutted it completely, did the floors, painted the walls, etc and then moved everything in to that room ticked it off the list and started on the next room. It was more manageable breaking it down by room otherwise you'll feel like your whole house is a building site and seeing the partly finished renos everyday becomes a bit depressing :)
DeleteGreat information just pulled up carpet in our house in Northam and are going to do the floorboards as they are in great condition, passage, office and kitchen were done before we bought it. Thanks
ReplyDeleteGreat to see the excellent results you have achieved! I pulled up the carpets in the 60s house. One bedroom the boards look like they were polished and sealed while the others two seem like we’re never polished. Sanded one of the unsealed room with 120g and then applied water based polyurethane. The results are nowhere close to what you have got. no shine.. kinda unsure what went wrong.
ReplyDelete